


Wayby SaaS setup – Installing Shopify
Welcome to Wayby SaaS
Hello!
Welcome to Wayby SaaS. Setup is quick and consists of a few steps:
1. Accepting the invitation
2. Adding your website
3. Generating a JS snippet
4. Adding the code to your Shopify
Below are the instructions for the first phase.
They explain how you can accept the invitation, add your website, generate the JS snippet, and start testing the service right away before the official start and setup process.
1. The Invitation
The invitation comes from invitations@wayby.io.
Just in case, please also check your spam folder to see if the email invitation arrived there.
The invitation is personal. With it, you can create a user account for the Wayby SaaS service by either:
A. Using a Google account
B. Adding a password, after which the user account is linked to your email address
2. Adding a Website
When you log in to the service (app.wayby.io) for the first time with your user account, the service will ask you to add your website. At this stage, all you need to do is:
1. Copy and paste your website address into the field
2. Press the “Analyse” button
3. When the analysis is finished, press the “Save” button in the bottom right corner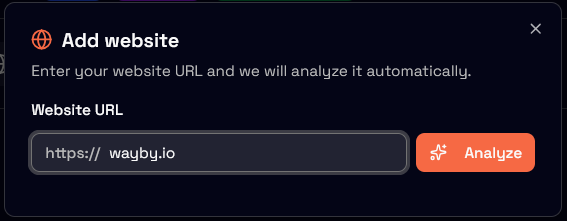
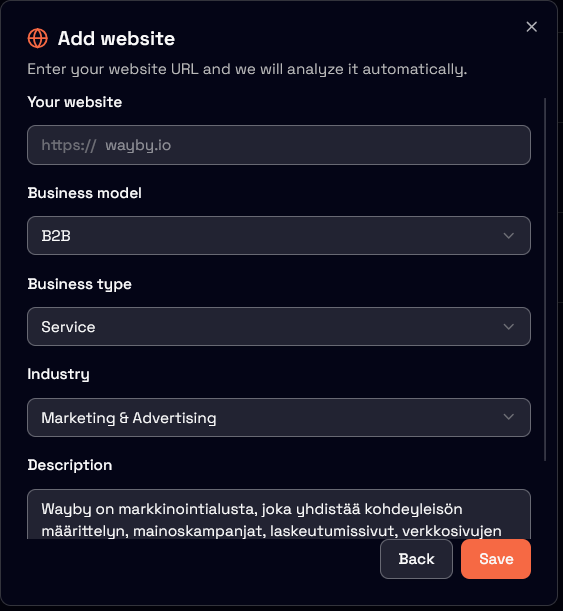
Now your website has been successfully added to your user account!
The final step is generating and adding the JS snippet. After this, the service will be 100% operational with all features.
3. Adding the JS-snippet
The JS snippet allows our service to work. Adding it requires three steps:
- 1. Finding and copying the snippet
- 2. Installing the Wayby-plugin
- 3. Adding the code to the Wayby-plugin
3.1 Finding the snippet
Your website’s personal JS snippet can always be found in the top left corner. Press the button to make the JS snippet available to copy.

Your personal code looks like this – press the “Copy snippet” button on top element dedicated for Manual Install:
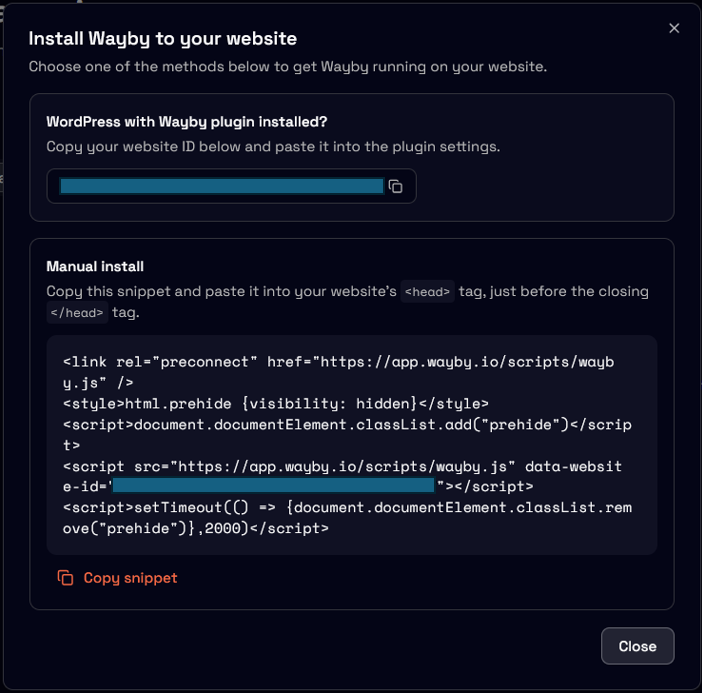
Note: The Website ID is blocked for security reasons. Do not share your personal Website ID with outsiders.
4. Installing the WordPress plugin on a Shopify site
Step 1: Create a Backup (Highly Recommended)
Before making any changes to your theme’s code, it’s always a good idea to create a backup. This ensures that if something breaks, you can easily restore a working version.
- Log in to your Shopify Admin dashboard.
- In the left-hand menu, click Online Store, then select Themes.
- Find your currently active theme. Click the three dots … next to the Customize button (or Actions in older versions).
- Select Duplicate. This will create a copy of your theme as a backup further down the page.
Step 2: Add JavaScript to the Header
You can now safely add your code to the published theme.
- For your active theme, click the three dots … again and select Edit code.
- In the left-hand sidebar, under the Layout folder, find the file named
theme.liquidand click it. This file controls the overall layout of your website, including the header. - In the code editor, locate the
<head>section. You will usually find the opening<head>tag near the very top of the file (approximately around lines 3–10). - Scroll down until you find the closing
</head>tag. Tip: You can press Ctrl + F (Windows) or Cmd + F (Mac) to open the search bar and type</head>to find it immediately. - Paste your JavaScript code on an empty line directly before the
</head>tag. - Click the green Save button in the upper-right corner.
Important Note About Formatting
Make sure your JavaScript code is wrapped in <script> tags so that the browser knows how to interpret it. If the code you received does not already include them, you will need to add them like this:
<script>
// Your JavaScript code goes here
console.log(“My script is running!”);
</script>
</head>
Congratulations!
You have now successfully created a user account and installed the Wayby on your Shopify. All the features of the service are now ready to use!
If any problems occur during the installation, do not hesitate to contact your personal Customer Success Manager by email at veikko@wayby.io.