
Wayby SaaS setup – Installing the WordPress plugin
Welcome to Wayby SaaS
Hello!
Welcome to Wayby SaaS. Setup is quick and consists of a few steps:
1. Accepting the invitation
2. Adding your website
3. Generating a JS snippet
4. Adding the code to your website with Wayby plugin
Below are the instructions for the first phase.
They explain how you can accept the invitation, add your website, generate the JS snippet, and start testing the service right away before the official start and setup process.
1. The Invitation
The invitation comes from invitations@wayby.io.
Just in case, please also check your spam folder to see if the email invitation arrived there.
The invitation is personal. With it, you can create a user account for the Wayby SaaS service by either:
A. Using a Google account
B. Adding a password, after which the user account is linked to your email address
2. Adding a Website
When you log in to the service (app.wayby.io) for the first time with your user account, the service will ask you to add your website. At this stage, all you need to do is:
1. Copy and paste your website address into the field
2. Press the “Analyse” button
3. When the analysis is finished, press the “Save” button in the bottom right corner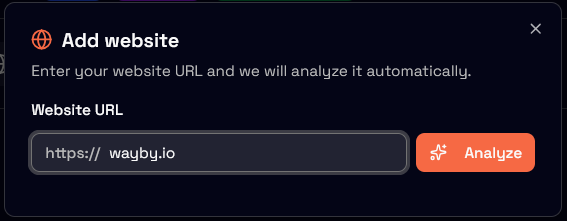
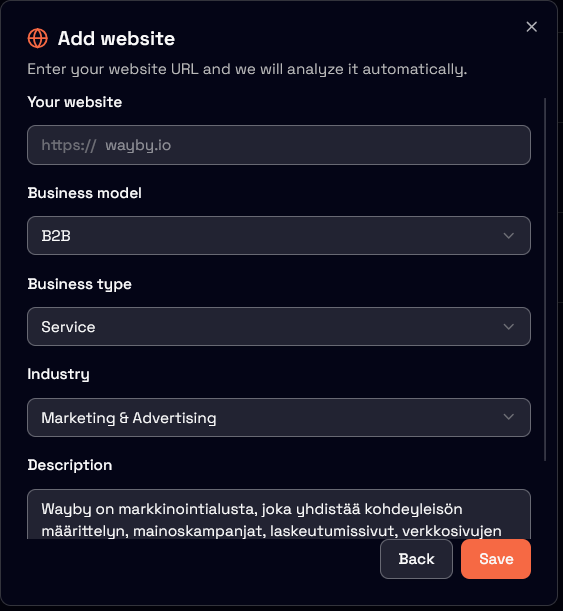
Now your website has been successfully added to your user account!
The final step is generating and adding the JS snippet. After this, the service will be 100% operational with all features.
3. Adding the JS-snippet
The JS snippet allows our service to work. Adding it requires three steps:
- 1. Finding and copying the snippet
- 2. Installing the Wayby-plugin
- 3. Adding the code to the Wayby-plugin
3.1 Finding the snippet
Your website’s personal JS snippet can always be found in the top left corner. Press the button to make the JS snippet available to copy.

Your personal code looks like this – press the “Copy” button on top element dedicated for WordPress:
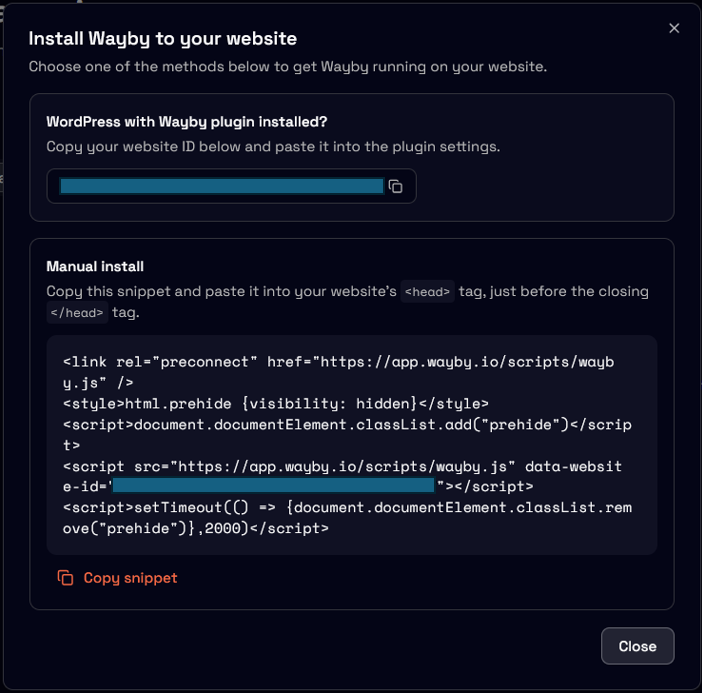
Note: The Website ID is blocked for security reasons. Do not share your personal Website ID with outsiders.
Installing the WPlite plugin and adding the JS Snippet to the header
4. Installing the WordPress plugin on a WordPress site
Now the final phase begins.
Go to the WordPress admin panel of your website.
On the left side of the panel, you will find the “Plugins” section, where you can download and manage third-party plugins.
Select “Add New Plugin”. Once you have reached the plugins page:
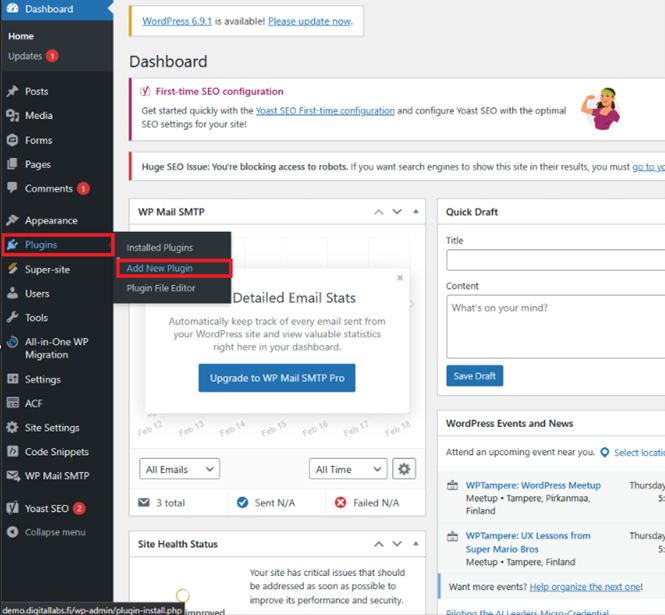
1. Search for “Wayby” in the top right corner – https://wordpress.org/plugins/wayby/
2. Press the “Install Now” button when you find the Wayby application 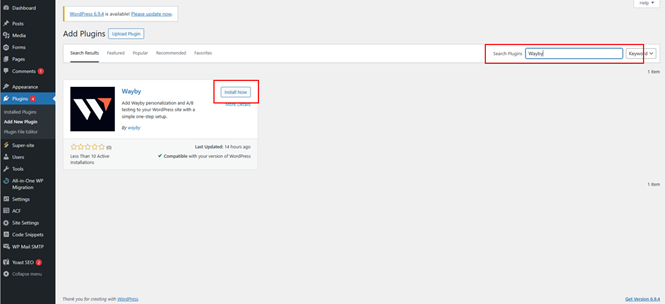
Press the “Activate” button, which appears in place of the “Install Now” button after a successful installation.
4.1 Adding and activating the JS-snippet
When the Wayby WordPress plugin has been successfully installed, a “Wayby” section will appear inside the “Settings” section. Press this section.
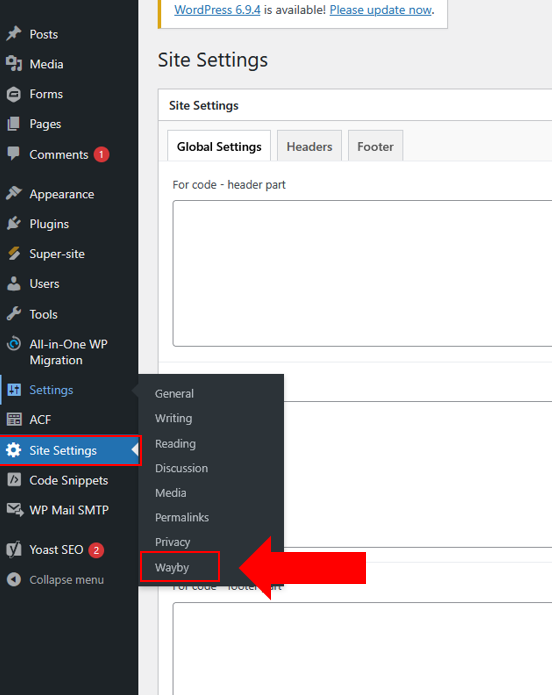
This opens the settings for the Wayby WordPress plugin.
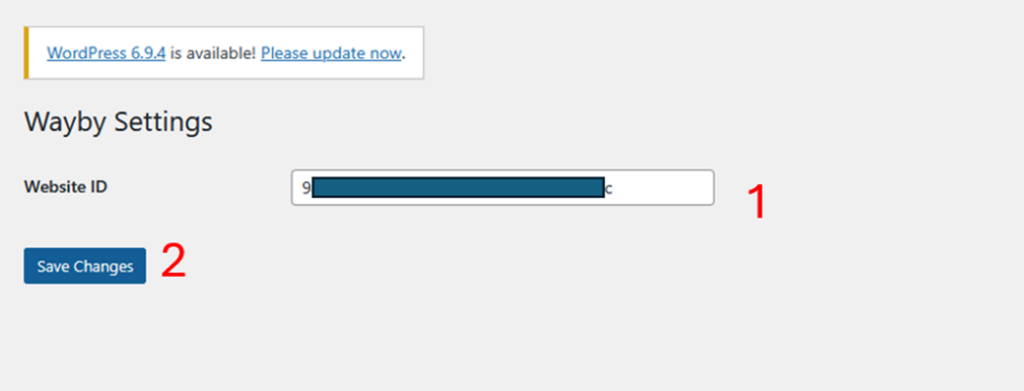
1. Paste the copied Website ID from the Wayby SaaS service (from step 3)
2. Press the “Save Changes” button
Congratulations!
You have now successfully created a user account and installed the Wayby WordPress plugin on your website. All the features of the service are now ready to use!
If any problems occur during the installation, do not hesitate to contact your personal Customer Success Manager by email at veikko@wayby.io.