Getting started – How to create your first campaign in Wayby
In this guide, you’ll learn how to create your very first campaign using Super-Site’s SaaS service. Campaigns allow you to manage and control what content is shown on your website, and setting one up only takes a few simple steps.
Creating campaign consists of only three steps:
1. Finding Campaigns-tab – app.wayby.io/campaigns
2. Starting a New Campaign
3. Campaign Setup – Selecting website, campaign name and potentially starting and ending time
In this guide, we will create Summer Sale 2026 as an example.
Where to find campaigns
All campaigns in Super-Site are created and managed from the Campaigns-tab. This page is also currently the front-page of the service.
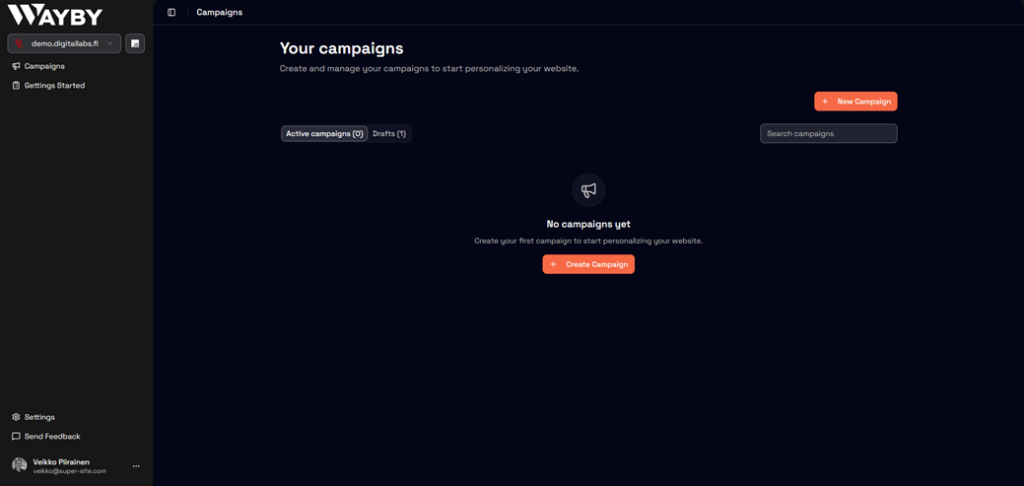
Once you open the Campaigns tab, you’ll see a list of your existing campaigns. Newly created campaigns typically start in Draft mode.
Starting a new campaign
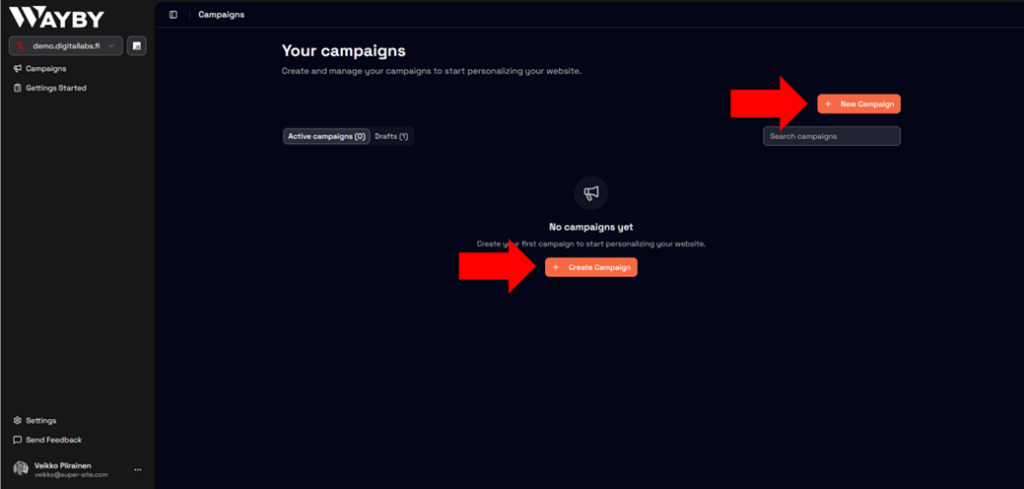
To create a new campaign, you have two options:
- Click the Create Campaign button in the middle of the screen, or
- Click the Create Campaign button in the upper-right corner
Both buttons start the same creation flow. In this example, we’ll use the button in the middle of the screen.
Campaign setup: Key things to consider
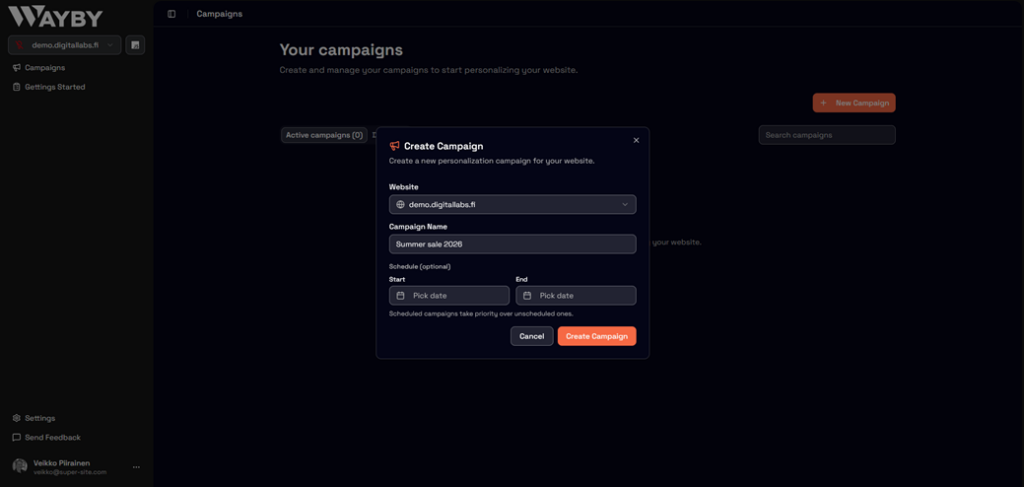
When creating a campaign, there are three main things you need to define:
1. Choose a Website
First, select the website where the campaign will run. Clicking the website field will show a list of available websites.
Note: Websites are managed and added from the Settings-page, which you can find in the bottom-left corner of the dashboard. If your website doesn’t appear here, make sure it has been added in Settings first.
2. Name your campaign
Next, give your campaign a clear and descriptive name.
Using meaningful names makes it easier to manage and recognize campaigns later.
3. Set a start and end time (Optional)
You can optionally define a start time and/or an end time for your campaign.
Keep in mind:
- Campaigns with a defined start or end time automatically override your other campaigns if they have similar landing page destinations.
- This makes them priority campaigns
If you don’t need scheduling or priority behavior, you can simply skip this step.
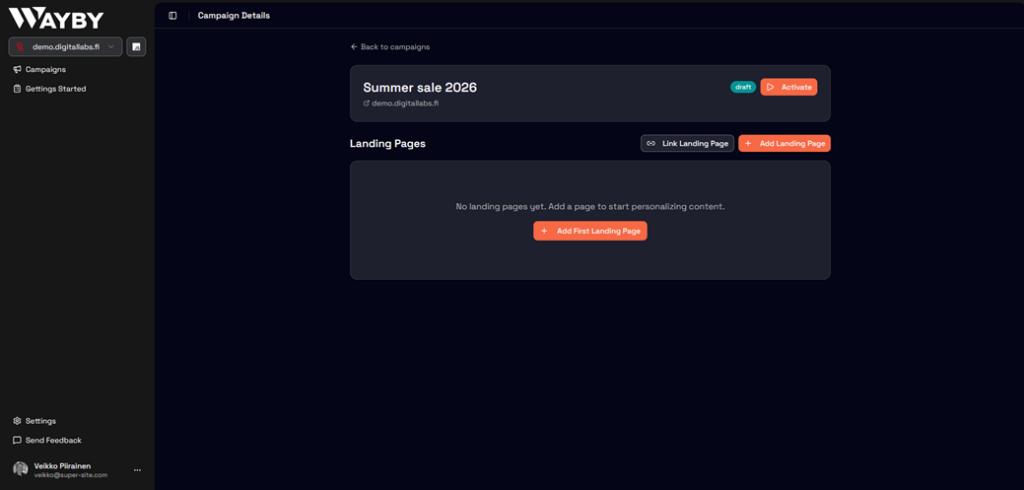
Campaign created
Once these steps are completed, your campaign is created. In this example, we’ve successfully set up our first campaign: Summer Sale 2026.
From here, you can continue configuring the campaign content, activate it when ready, and manage it directly from the Campaigns tab.