

Getting started – Adding in your very first landing page
Now that you’ve created your first campaign the next step is to add a landing page.
Landing pages are the core of how campaigns work in Super-Site, so understanding how they are structured and created is essential.
Understanding landing pages in Wayby
Before creating a landing page, there are two important concepts to understand:
1. Landing pages belong to campaigns
All landing pages in Super-Site are created inside campaigns. A landing page cannot exist on its own without being connected to a campaign.
2. Landing pages can be linked across campaigns
Landing pages can be reused. If you have a landing page that performs well in one campaign, you can link it to another campaign using the Link Landing Page option. This allows you to reuse successful setups without recreating them from scratch.
Starting the landing page creation process
To create your first landing page, you’ll see two buttons on the screen:
- Add First Landing Page in the middle of the screen
- Add Landing Page in the upper-right corner
Both buttons start the same process.
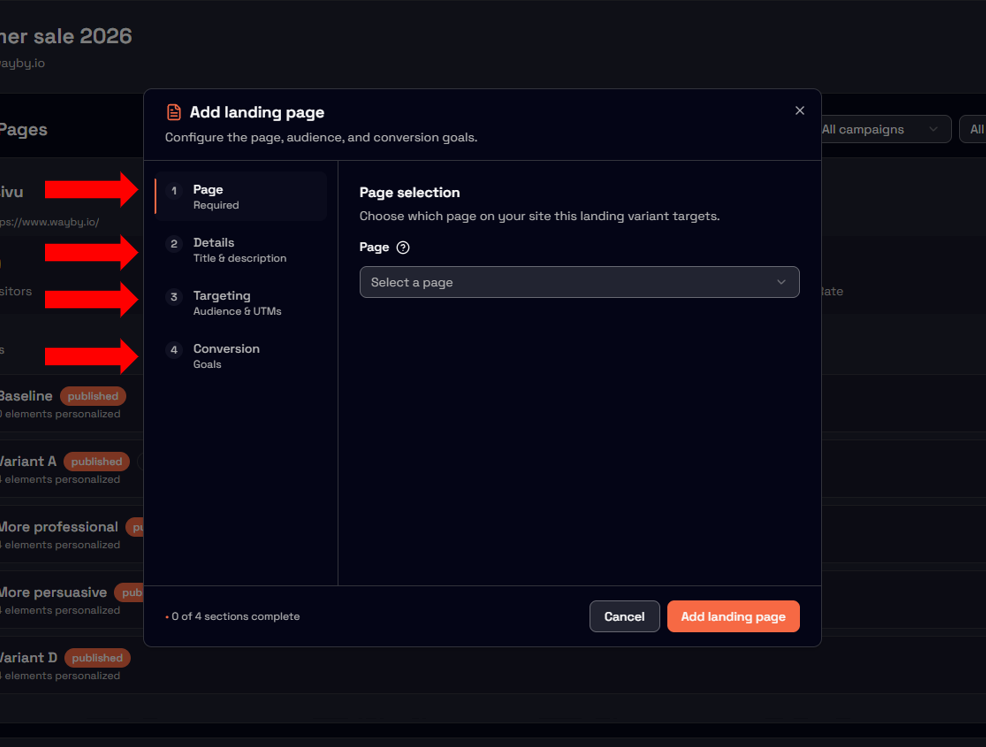
Landing page setup: Key configuration steps
When creating a landing page, there are five main things to configure.
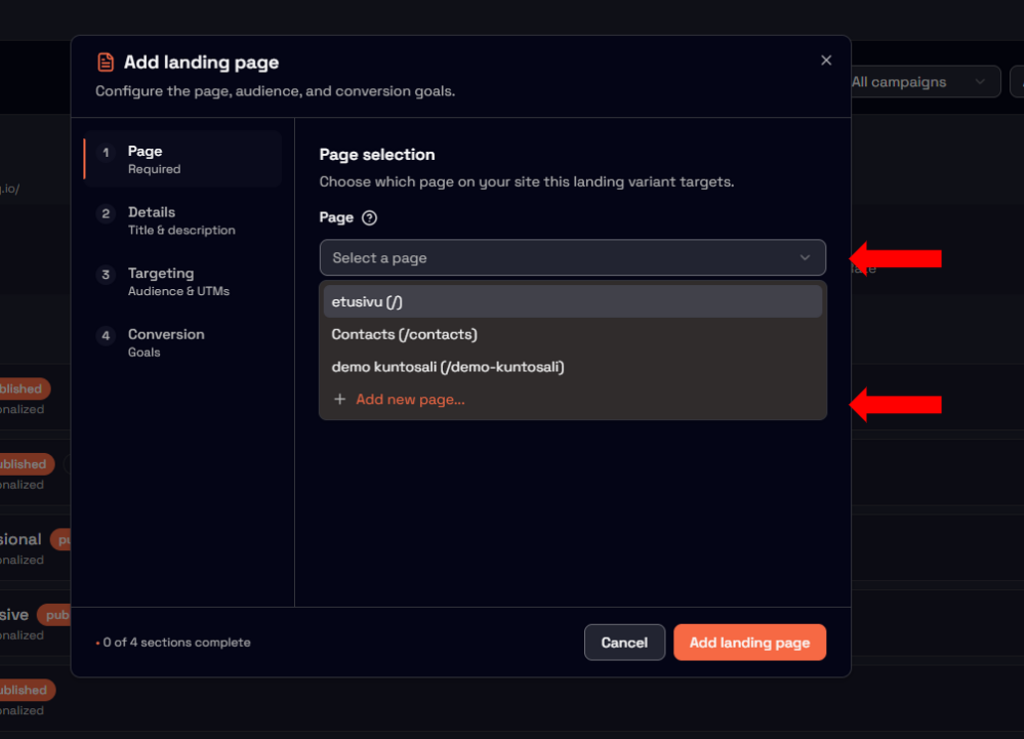
1. Select the page
First, choose which page under your website’s domain you want to use as the landing page. This determines where the campaign logic will be applied.
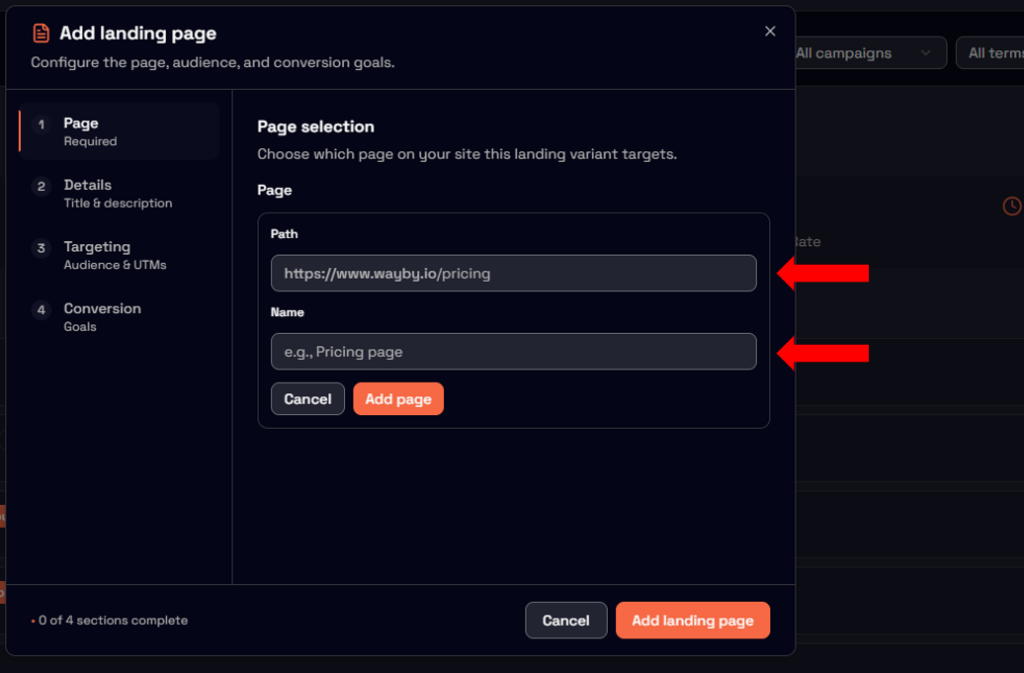
Path
When adding a new page you can copy-paste the destination URL to the Path-section. Do not be alarmed, the system automatically removes the first part of the website URL out.
Name
Give your new page a descriptive name. If you example copy-paste super-site.com/contacts/ we highly recommend writing Contacts-page as a name. This helps you to keep track of and remember all the individual pages you have added in.
2. Add a title (Optional but recommended)
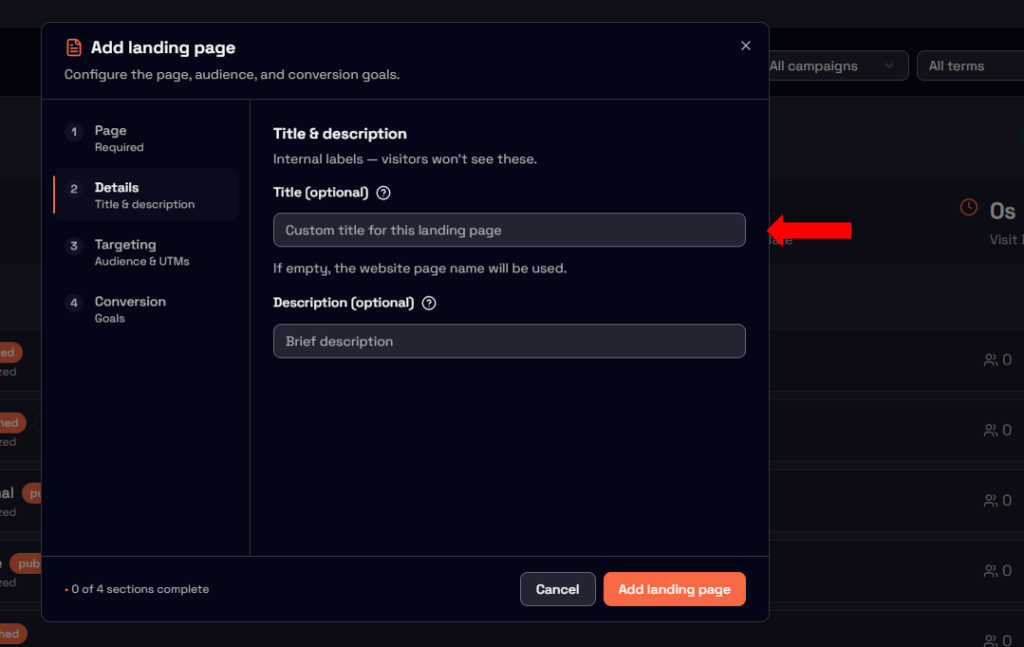
The title field is optional, but adding a clear and descriptive title makes it much easier to manage, analyze, and reuse landing pages later.
A good title improves clarity across the platform, especially when working with multiple campaigns.
3. Write a description
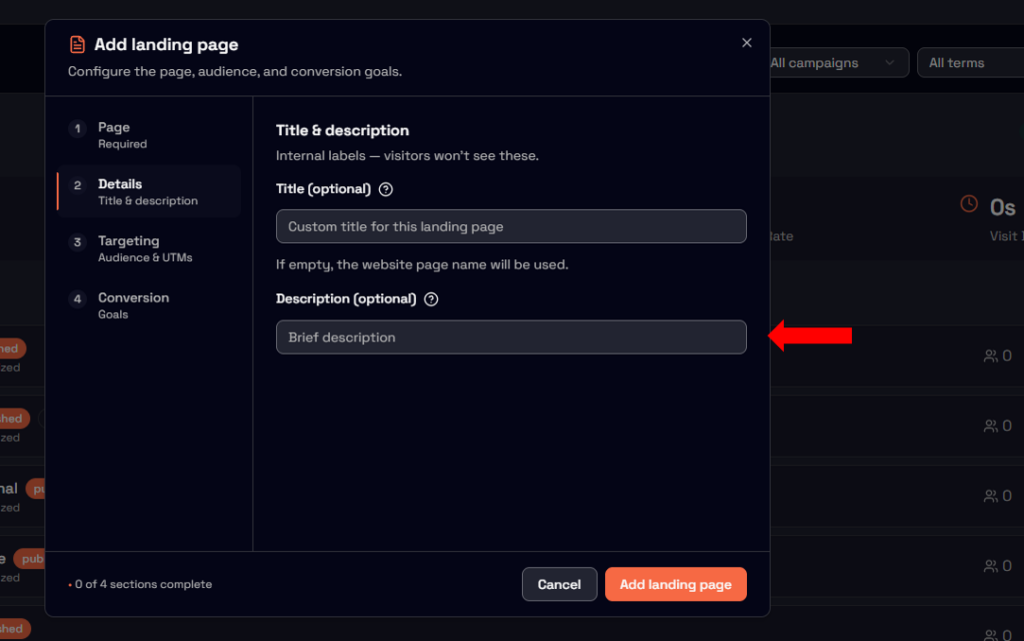
We highly recommend adding a short description for every landing page.
Descriptions help you:
- Remember the objective of the page
- Understand campaign intent when analyzing performance
- Make future changes with full context
For example, you might describe whether the goal is lead generation, sign-ups, or conversions. The objective of the content or the content changes themselves are great descriptions!
4. Configure UTM triggers
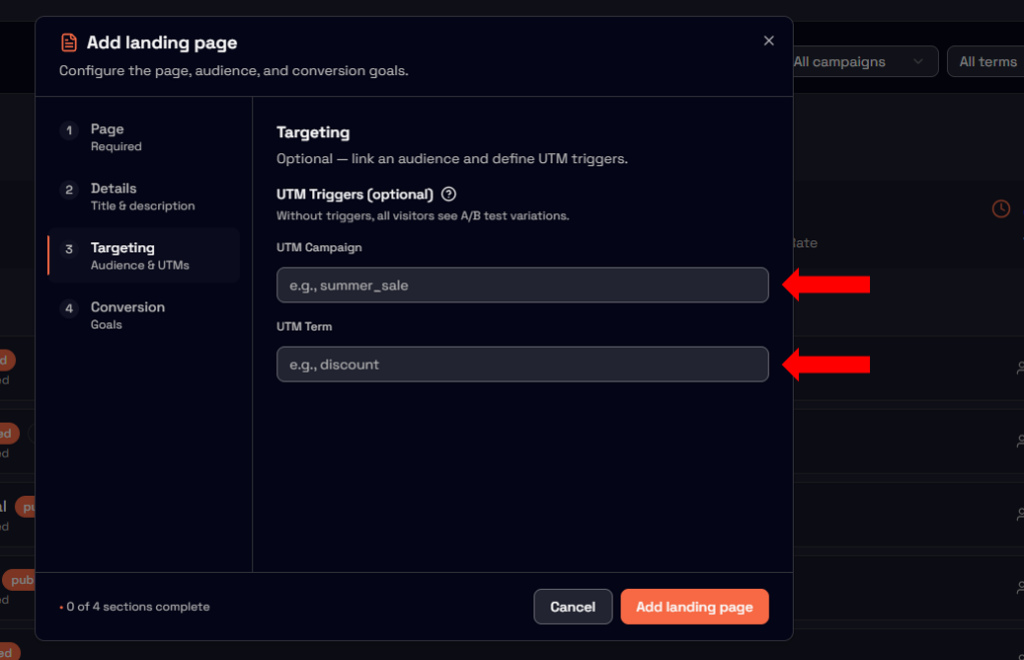
Super-Site allows you to use custom triggers based on UTM parameters. You can use:
- UTM Campaign
- UTM Term
- Or both at the same time
These triggers allow you to control when the landing page logic is activated based on incoming traffic parameters. Using UTMs is optional and depends on your campaign strategy.
5. Define conversion criteria
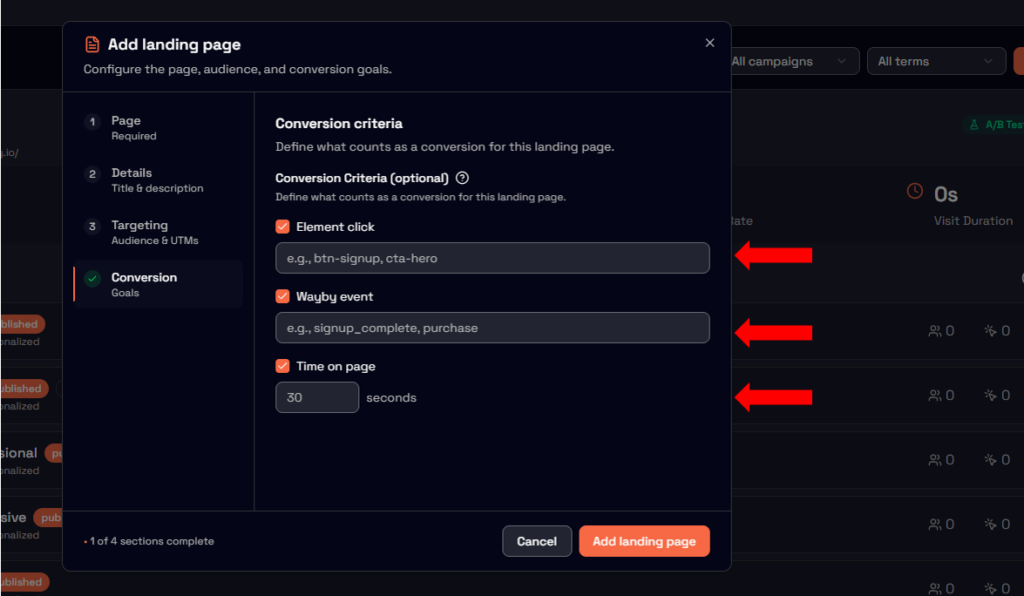
By selecting a conversion criterion, Super-Site can calculate a conversion percentage for your landing page.
Conversion criteria are typically based on user actions, such as clicking a specific button or element on the page.
Element Click
These are the coded names of the elements such as buttons. Name of these buttons can be found by hovering mouse over the element, right clicking and sepecting inspect. You will see the name of the element which you can input here.
Wayby event
If you use website creation and editor tools such as Elementor, you can give elements custom names inside the tool. Writing the same name here will connect interaction with that element with your conversion target.
Time on page
If visitors stay on your website as a key conversion point, you can select seconds as a conversion target. For example, each setting target to 30 seconds will count all users who stay 30 seconds or longer as a successful conversion.
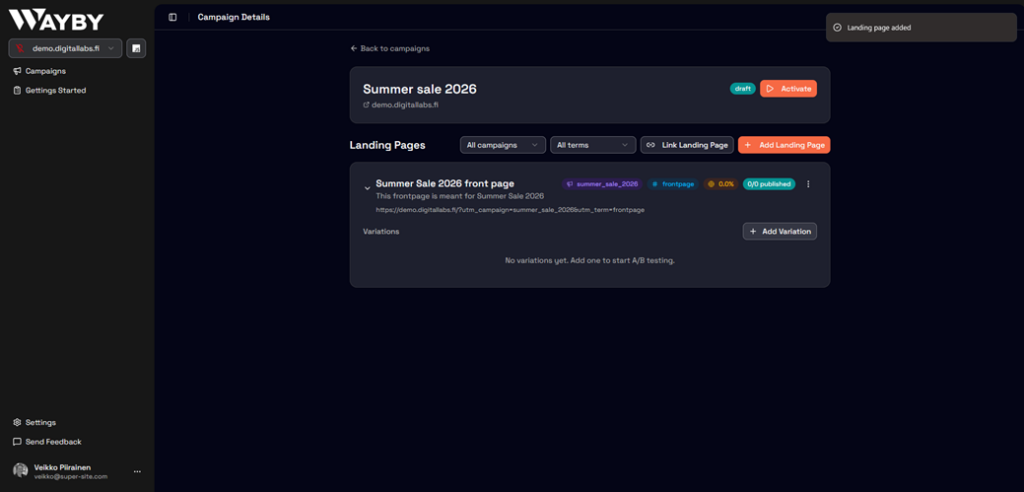
Landing page created
With these steps completed, you’ve successfully created your first landing page for your campaign. The landing page now tracks conversions based on set conversion, giving you clear insight into how effectively visitors are converting to set goals.